
Advanced Custom Fields (ACF) is one of the most widely used plugins for adding custom content fields to WordPress. Whether you’re building a simple blog or a complex custom theme, ACF allows you to define and manage structured data through an easy-to-use interface. With field types like text, image, repeater, and relationship, ACF gives developers powerful tools to enhance content flexibility across any WordPress site.
On the other hand, the WordPress Block Editor, also known as Gutenberg, has changed how content is created and managed in WordPress. Instead of relying solely on the classic editor or PHP templates, users now build content using visual blocks. This modern editing experience brings a lot of flexibility for content creators, but it also introduces new challenges for developers, especially when working with custom fields.
How to Load ACF Fields in the Block Editor?
Traditionally, ACF fields are displayed on the front end of the website by manually retrieving them using functions like get_field() or the_field() inside PHP templates. This method works well with traditional WordPress themes, but it doesn’t integrate directly into the block-based editing experience. As a result, users cannot see or interact with ACF data inside the Block Editor while editing a page or post.
To bridge this gap, ACF Pro introduced a feature called ACF Blocks. This allows developers to register custom blocks using PHP and load ACF fields within them. It’s a step forward in integrating custom fields into the block editor, but it still requires a good amount of setup, including block registration, template files, and sometimes custom JavaScript. For many users and even developers, this process can feel overly technical or time-consuming, especially when working on smaller projects or under tight deadlines.
This disconnect between ACF and the Block Editor has led many WordPress users to look for simpler solutions. How can we easily load ACF fields directly inside the WordPress Block Editor without diving deep into PHP or React? How can we make the most of ACF WordPress blocks without a complex setup?
A Simpler Way to Load ACF Fields in the Block Editor
If you’ve struggled with the complexity of registering ACF Blocks manually or found it frustrating that ACF fields don’t appear visually inside the Block Editor, you’re not alone. That’s exactly why I created Blocks for ACF Fields.
Blocks for ACF Fields is a plugin designed to make it incredibly easy to display your ACF fields directly inside the WordPress Block Editor—without writing a single line of PHP or JavaScript. With just a few clicks, you can add ACF blocks that render your custom fields exactly where and how you need them, making your content editing process more intuitive and efficient.
Load ACF Fields without Write a Single of Code
In this section, I’ll walk you through how to load ACF fields into the WordPress Block Editor using the Blocks for ACF Fields plugin. This approach requires no custom code, making it an efficient and user-friendly solution for developers and content creators looking to integrate custom fields into their block-based templates with ease.
1. Create Custom Fields with ACF
In this tutorial, we’ll be using a custom post type called Movies as our example. If you’re using a different post type like standard posts, pages, or any other custom post type the same steps will still apply.
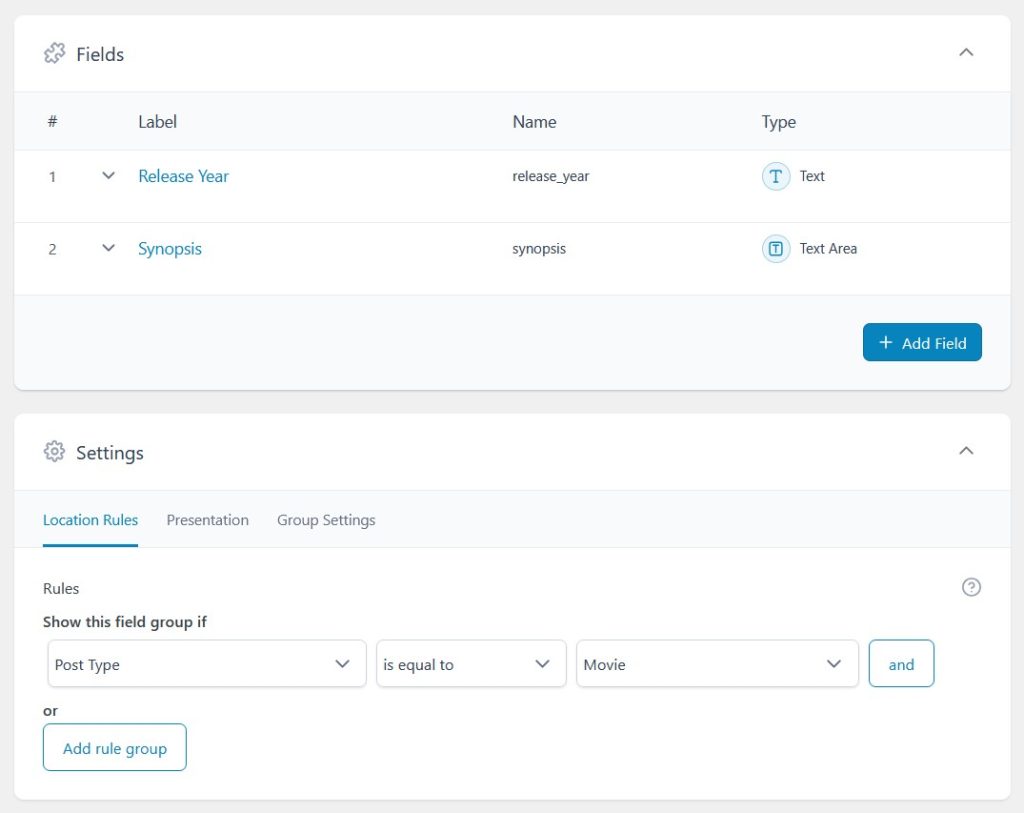
Start by going to Custom Fields → Add New in your WordPress dashboard to create a new field group. Add the following two fields:
- Release Year (Field Type: Text)
- Synopsis (Field Type: Textarea)
Be sure to set the Location Rules so that the field group appears for the post type you’re working with. In this case, set it to Post Type is equal to Movies. This ensures the fields show up when editing relevant content.
Click Publish to save the field group.
2. Add Movie Posts and Fill the Fields
Next, go to Movies → Add New and create a few movie entries. For each one, fill in the Release Year and Synopsis fields.

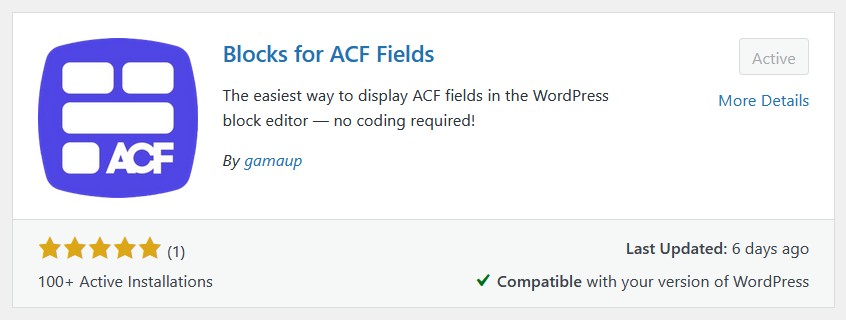
3. Install Blocks for ACF Fields
Now it’s time to install the plugin that simplifies the entire process. Download and install Blocks for ACF Fields from your WordPress dashboard or manually upload the plugin file if you have it.
Once activated, the plugin will be ready to use inside the Block Editor.
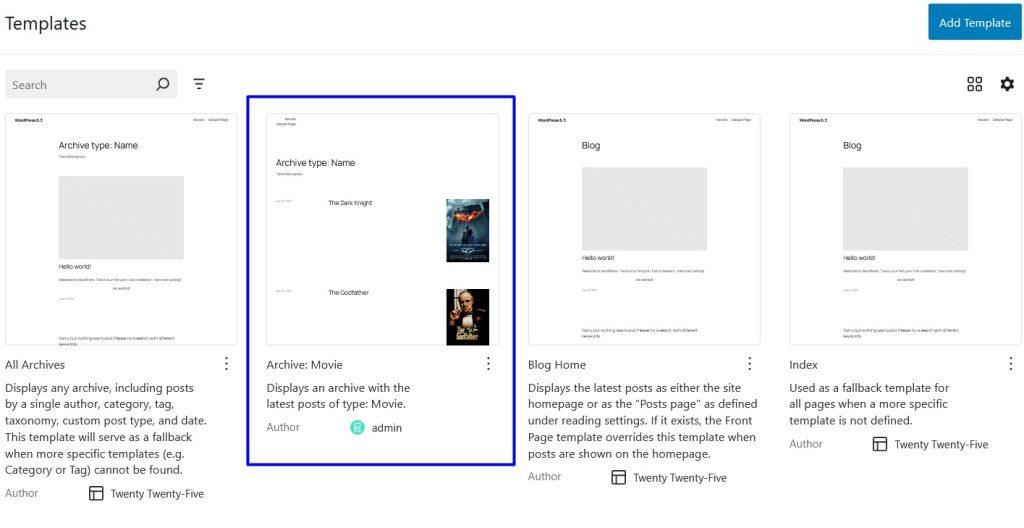
4. Open the Site Editor and Select the Archive Template
Go to Appearance → Editor, and from the template list, select the Movies Archive template. This is the layout WordPress uses to display your movie listing page.
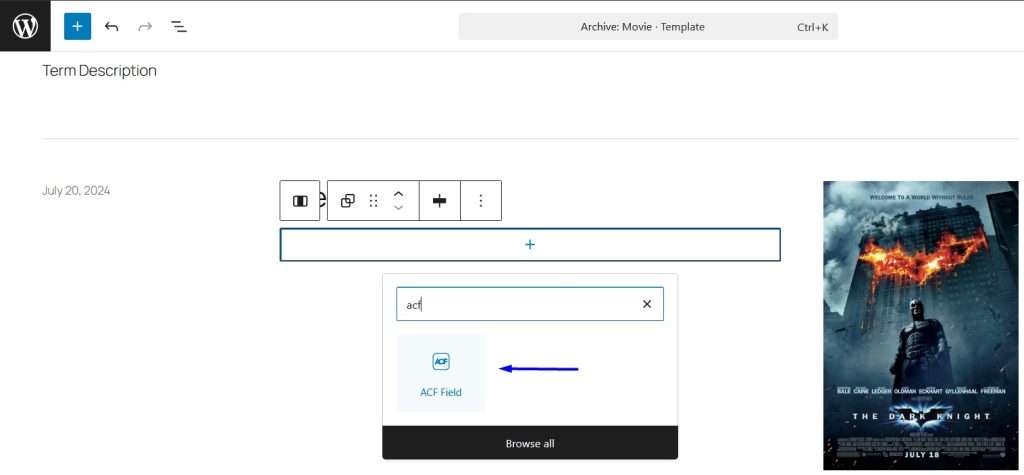
5. Add an ACF Field Block to the Post Loop
Inside the archive template, locate the Post Template block (the loop that repeats for each movie post).
Click the “+” button to add a new block within the loop. Search for “ACF Field”, which is provided by the plugin. Insert it into the layout.
6. Set Field Source and Field Name
With the ACF Field block selected, look at the block settings in the right sidebar.
- Set Field Source to Current Post
- Set Field Name to
release_year(or whatever the field name is in your setup)
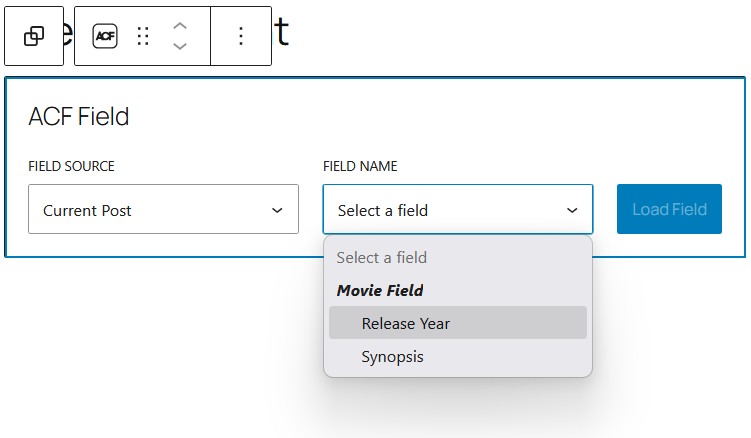
The block will now dynamically show the Release Year for each movie.

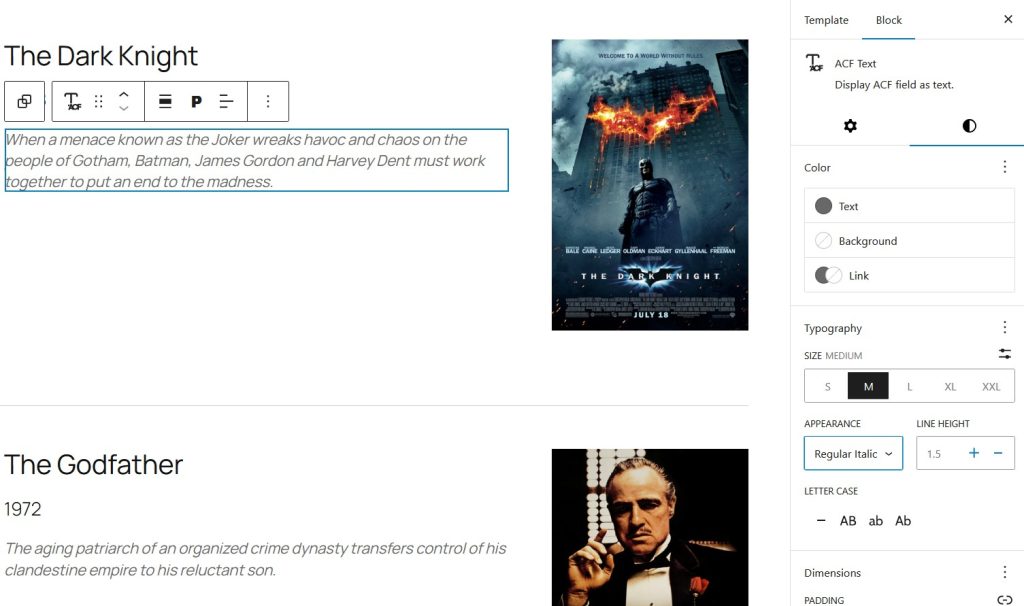
7. Repeat for the Synopsis Field
Repeat the same steps to add another ACF Field block, and this time, set the Field Name to synopsis. You can place it below the title or anywhere you’d like in the layout.
8. Style the Blocks to Match Your Design
You can now style these ACF blocks using WordPress’s built-in block styling tools. Adjust typography, spacing, or background as needed to match the look and feel of your theme.
9. Save and View the Frontend
Once you’re happy with the layout and styling, click Save in the Site Editor. Then view the Movies archive page on the frontend. You’ll see each movie post displaying its custom fields—exactly where you placed them, fully styled, and fully dynamic.

Conclusion
Loading Advanced Custom Fields into the WordPress Block Editor no longer requires custom blocks, PHP templates, or extra development time. With Blocks for ACF Fields, you can display nearly any ACF field directly inside the editor using a single, flexible block, making your workflow faster, cleaner, and more maintainable. Whether you’re building dynamic templates, reusable patterns, or full site editing layouts, this approach keeps everything visual and code-free.
To explore advanced use cases, supported field types, and detailed configuration options, be sure to check out the full documentation here: Documentation